Monday, April 29, 2019

Online Tutorial 3: The Story of the Experience

Hi All,

This is the third and final online tutorial for ARCH1101, take a look at this introduction:


Your task is to create a short film the represents the experience of moving through your architecture. But more than asking you to simply document your architecture, we are asking you to create a "story" ... a film that has something to say about the experience of your architecture.


This film will form a major part of how your tutors assess your architecture, which is worth 50% of the total submission, so it's worth putting in extra effort to get it the best it can be.


Tutorials:
Movie Mode - Lumion
10 Tips for making a great movie in Lumion

To get started lets consider the technical aspects of creating a film. Here is an explanation of the framing technique called "The Rule of Thirds". It shows how film makers divide the frame to draw attention to certain parts. You should also think about composing the frame in terms of depth too ... providing something in the foreground, something in the middle distance and something far away. You can use approaches like this to lead the viewers eye around a shot without even moving the camera.


Next we have a clip from the film "Kill Bill", by director Quentin Tarantino. Apparently Tarantino worked in a video rental store before becoming a full time director ... it shows in this scene where he uses almost every cinematographic technique there is; inspired by the many films he must have seen. Notice only a few of these camera motions are similar to the default "Fly Through" technique that is so common in student architectural visualizations. Appropriate use of some of the other camera motions shown below will give your film a much more specific character; it will help to tell your story.


In this scene from the film "The Life Aquatic with Steve Zissou" by Wes Anderson we pan around a section of the ship they use in the film. Specific action occurs as we arrive at each location. The relationships between each space and the ships structure is revealed as we move from one part to another. Light also plays a key role in presenting the section ... revealing and concealing scale. Overall the feelings is somewhere between realism and abstraction; the voice of the narrator and actions of people as wooden as the ships structure. Potentially because of this, the film didn't receive very good reviews (by the public or film critics) but there is plenty to learn here if your subject is revealing the experience of architecture.


The next clip is a film about a film. It documents the layers that are composited together to create the finished images: HDR backgrounds, digital models, texture maps, bump maps, specular maps, dust passes, bloom, etc etc ... It's amazing to see how much work goes into making something look real. And from the opposite point of view, its amazing to consider the many material aspects that make a significant contribution to our impression of reality. You have access to a few post production effects in Lumion as well as being able to create custom textures and further modify them through the materials dialogue in Lumion. Keep in mind that the effects and materials you chose should support the experience you are trying to convey, rather than being a demonstration of everything that is there or could be there.  


The advertisement below, for Fox NASCAR, was produced by a company called Psyop. Their goal is to "blur the lines between entertainment and advertising." An old friend of mine, and ex architecture student, Melanie Tonkin worked on this project. Melanie was one of the best architecture students of her year and you can see her attention to space, point of view and time (slowing it down at a critical moment, for example) coming through from her architectural education. Take a look at her show reels at the link above to see how you could use your architecture degree to get into a field outside the built environment. In the clip below you'll see a story that conveys the intensity and excitement of NASCAR racing in 32 seconds.


I must have been thinking about Melanie's work when I composed the clip below as a part of documenting an artwork I made as a a part of my PhD. The artwork and video are called "Thrown". Two videos are from GoPro cameras, with a third screen captured from my laptop. The live footage shows two points of view as I am thrown out of a light aircraft at 13,000ft. The screen capture shows the EEG recording of my brain waves as I fall. The colour bars are the type you might see on a TV screen or computer monitor when you are checking that colours are displaying correctly. The composition looks a little slapped together ... without much through to composition or elegance ... but when you notice that the black bar actually deviates slightly to accurately line up between the intersection of the red and blue bars you might think that there is more to the composition than that first meets the eye. Your tutors are expert in seeing these kinds of subtleties; but even still, you would be wise to mention the subtle, but important, aspects in your short films in the short text that will accompany them on your blogs. My story starts a few seconds before leaving the plane with the act of putting on my blindfold. As I tumble out of the plane the EEG starts to respond. There is a moment of calm falling and then the chute opens ... the video then plays backwards, rewinding me back into the safety of the aircraft. When this video is shown in exhibition it loops continuously.  


Th following video inspired this online tutorial. It is by an ex ARCH1101 student, Hugo Vos. You'll see how he introduces his architecture from ANZAC Parade and the UNSW main walkway before taking us on a tour through its main spaces. The video is primarily a fly through, but he does pause often and the camera doesn't move so fast that we get dizzy. He does use panning shots when showing the moving elements though, which introduces some variety. He might have been inspired by the tracking backwards shot in the Kill Bill clip above to finish off his film. Overall we get a really clear idea about how a visitor would experience the architecture ... we don't pass through walls and often shots are from eye level; both qualities you should aspire to.


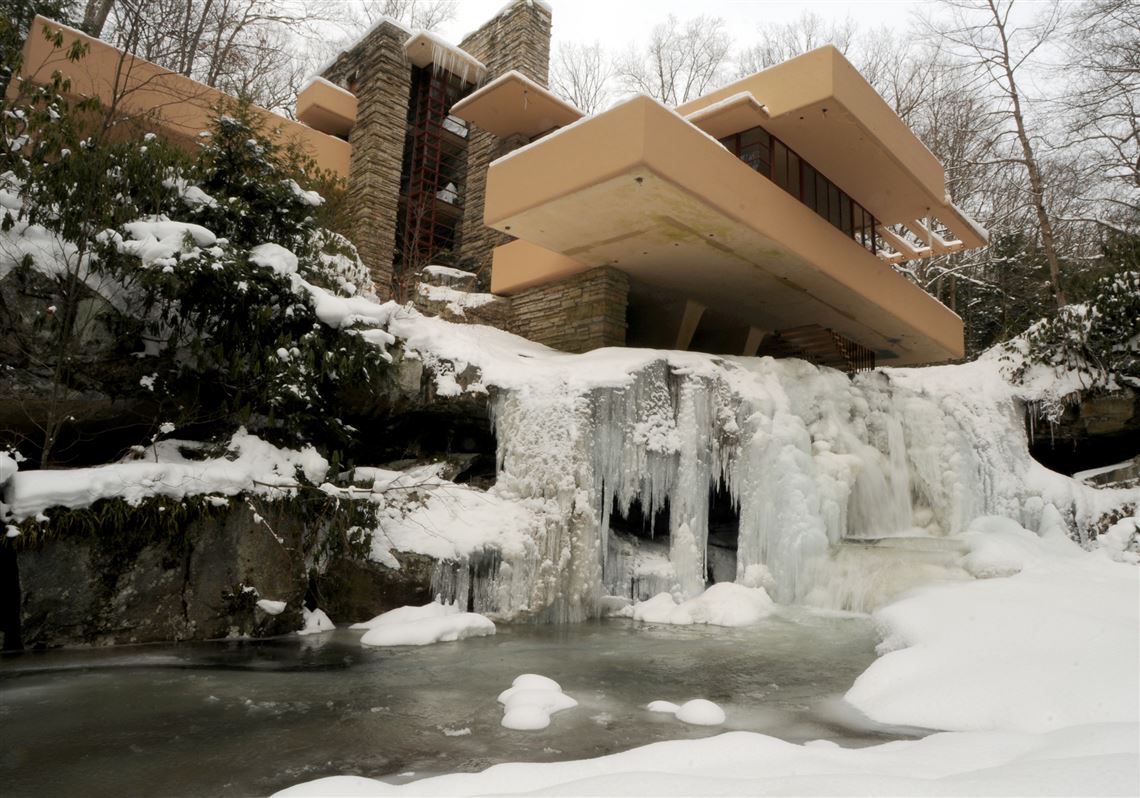
This older video by Harry Kealy (prepared for another course, not ARCH1101) tells the story of the 21st Century Museum of Contemporary Art, by SANAA Architects, 100 years after a nuclear apocalypse has removed all humans from the face of the earth. Harry uses slow pans and still shots to accentuate the stillness and gravity of the architecture that now lays in ruins. Snow falling adds to the bleakness. The thin white font he uses in his titles reinforces the sparsity; doubly reinforced by his choice of soundtrack.


The final example advertises work that I've been involved with, Virtual Reality Safety Training. It mainly uses a fixed camera position with tracking shots that follow the action. What is its story? In this case its a very simple story ... that there are many hazards on a construction site and that accidents happen unpredictably.


Your stories can be as simple as that ... we don't expect a "War and Peace" length extravaganza. We do expect you to communicate a strong message about whats important in the experience of your architecture.

Regards

Russell

Saturday, April 27, 2019

Lecture and Studio on Tuesday

Hi All,

Just a quick reminder that this weeks lecture and studio (the final one's for ARCH1101 this year) are on Tuesday (30th of April) this week. The lecture kicks off at 12, midday, followed by studio from 2-6pm. Both in the normal venues

The lecture will go through a series of projects to describe their strengths, weaknesses and the opportunities their authors exploited, or might have exploited, to get a better grade.

You'll get a good idea on what standard we expect and some ideas about how to be successful.

In the meantime, take a look at this TED talk by Architect Joshua Prince-Ramus (working for OMA). In just 20 minutes he presents the design process behind 3 major projects ... showing how powerful their architectural response comes from an honest and open evaluation of the context from first principles.


See you on Tuesday!

Regards

Russell 


Monday, April 22, 2019

Online Tutorial 2: The Big Idea

Hi All,

This weeks tutorial is called "The Big Idea" and uses two animated axonometric drawings to convey a summary of your developed design with only 6 rectangular prisms.

Here is an introduction:


And here is an example I made to give you an idea of what you'll end up with after following the tutorials below (you'll note that it only uses 4 rectangular prisms ... you have 6):


Axonometric animation with 3 positive rectangular prisms and one negative rectangular prism. 

Online Animated Gif Maker: https://imgflip.com/gif-maker

Making Animated Gif's in Photoshop:


So first things first, what is an axonometric?

An axonometric is a type of architectural drawing that represents three dimensions on a two dimensional page (or screen). In that way it is similar to a perspective drawing that makes it seem like three dimensional objects, or spaces, are coming out of or receding into the page; like looking through a window. The main difference between an axonometric and a perspective is that in an axonometric where two lines are parallel in the geometry of your design they remain parallel in the drawing. You'll remember that in a perspective drawing parallel lines converge at one or more vanishing points.

What do they look like? Here are some examples from Pinterest... (I'd suggest starting your own Pinterest page to capture the things that inspire you; I guarantee it will become an invaluable resource throughout your degree).

And how do you draw them? Take a look at this video tutorial ...


What are they good for? In short, they are best for concept drawings and construction details. 

They are good for construction details because they communicate dimensions very clearly (primarily because they don't distort proportions like a perspective sketch does ... ). See this great example on archdaily where they are used to illustrate traditional Japanese joinery details.

But in this tutorial for ARCH1101 you'll be using them to show a summary of your design; which is a concept drawing. 

Perhaps the best examples of this are from the Architecture firm BIG.

BIG's use of diagrams to clearly communicate their design intent, another way to say their "Big Idea", is unparalleled 

The diagram above in its New York context.
Axonometrics don't preclude curvilinear geometry, but they are trickier to construct.
https://big.dk/#projects well worth a visit

Drawing axonometrics is a great skill to have, you'll find them invaluable in your discussions with your tutors this year and for the rest of your studies, so don't be afraid to pull out your notebook and practice whenever you get the chance.

And finally, be sure to take a look at all the tutors blogs as they identify a particular building, project, movement or product where representing the design through the axonometric made an important contribution to it ... in other words, the way they used the axonometric made the project both distinctive and significant. 

Regards

Russell


Architecture at Speed

Hi All,

Thought I would share this article that I recently came across from the New York Times: "A Generation of Architects Making Its Mark at Dizzying Speed."

I especially note the "technological revolution" that has enabled them to make such a great impact in such a short amount of time. 


Citta del Sole in Rome, designed by Labics Studio.
Imagine what they could have done if they had access to the technologies you are all familiar with?

And once you have imagined that, get on with it ... because if you do, one day the New York Times might be writing an article about you.

Sincerely,

Russell  

Wednesday, April 17, 2019

Student Rep Meeting 02: Notes

Hi All,

There were some questions asked in our second student rep meeting last week; below are my responses.

Q1. Regarding the perspective sketches of the crosses, do they need to include the buildings?

A1. No, just the crosses with the adjusted dimensions on each leg is fine; your tutor should be able to see that they started out as crosses though.

Q2. Do you need to import the campus model into Lumion?
A2. Yes, its important to see the context so your architecture can be evaluated properly.

Q3. Whats the point of the plan becoming a section exercise (from Week 03)?
A3. I agree it seems like a strange thing to do ... force your design into someone else's plan and then use the plan as a section because it was never intended to be used that way.

But there are actually very good reasons for doing so. Firstly, by starting with the plan from a great piece of architecture it gives you a head start; all of the plans you could choose from have interesting things going on and responding to them helps you to make decisions about the general arrangement of your spaces. In other words, the existing plans impose limits and limits give you something solid to push off from. Remember, its a negotiation between your developing design and the plan that you chose ... we would expect both to change to accommodate each other. Secondly, by turning the plan through 90 degrees so that it becomes a section helps you to avoid the problem that most inexperienced designers make ... that their architecture is simply an extrusion of the plan. For many beginner designers the plan is often quite lively; spaces are arranged freely across a two dimensional plane without much feeling of restriction. But when they come to making spaces in three dimensions gravity and their personal experience often tells them that walls go straight up, so they make their plans go straight up. they them repeat the process for the next floor up ... often keeping to the outside envelope of the floor below. This results in very one dimensional spaces; they are all the same in terms of their floor and ceiling levels. By using the plan as a section this forces you to think about spaces that have varying heights, that may go up or down. If you interrogate the finished buildings that are shown alongside the plans you could choose from you'll see this kind of spatial variation. In fact its vary rare in great architecture to see multiple floors with the same floor to ceiling height across entire levels.

Let me know in the comments below if this makes sense to you.

Here's an interesting example by Buro Ole Scheeren, inspired by a cloud, its lively spaces in terms of heights and arrangement (including the large void in the middle) is surrounded by exactly the types of spaces I'm asking you to avoid ... this is a great example of knowing the "rules' and then breaking them:


See the article at ArchDaily.


Regards

Russell


Sunday, April 14, 2019

Architecture with More

Hi All,


In 1980 Coop Himmelblau said that they wanted architecture to have more: 

"Architecture that bleeds, that exhausts, that whirls and even breaks. Architecture that lights up, that stings, that rips and under stress, tears. Architecture should be cavernous, firey, smooth, hard, angular, brutal, round, delicate, colourful, obscene, voluptuous, dreamy, alluring, repelling, wet, dry, throbbing. Alive or dead. Cold then cold as a block of ice. Hot then hot as a blazing wing."

http://www.coop-himmelblau.at/architecture/projects/the-blazing-wing

Unfortunately, almost 40 years later, there still aren't many examples of architecture with this kind of passion.

This week in studio we will be looking at movement, one way of bringing more to architecture.

Begin by taking a look at this pinterest board for inspiration.

Regards

Russell  

Sunday, April 7, 2019

Best Work from EXP1: The Datum

Hi All,

Time to celebrate the best work from EXP1: The Datum. Below are a few images and links to the blogs of the top scoring students in the first experiment. There is plenty more to see so I encourage you all to take a good look around.


Presented in no particular order:


https://gohjingyong.blogspot.com/


https://xiaoqliu.blogspot.com/


https://chriswang1101.blogspot.com/

https://benselig.blogspot.com/


https://stephaniethelin.blogspot.com/

https://arch1101-lwj.blogspot.com/
https://yqluo.blogspot.com/

https://zezhouchen.blogspot.com/

https://myunswarch1101.blogspot.com/

https://joetruongthang.blogspot.com/
Enjoy!

Russell

P.s. Here is an animated gif of the images above created using an online gif maker from imgflip.com . You'll all be making animated gifs of your axonometric diagrams in the second online tutorial.


Saturday, March 16, 2019

The Hero and the Detail

Hi All,

This weeks tutorial is totally online. This means that while studio is scheduled for Thursday the 21st of March you don't need to come that day ... your tutors wont be there.


Instead, they are all working on precedents for Hero and Detail shots for you to reflect on and be inspired by. Look out for these to be uploaded to their blogs on Tuesday.


Below is an intro video describing what your task for this week is:


And here is a video tutorial showing the workflow from SketchUp to Lumion along with object placement, material editing, still and panorama rendering.


As each of your tutors is going to upload Hero and Detail shots from 5 architectural projects to their blogs I thought I would do the same.

My first examples are from a project by the great American architect Frank Lloyd Wright, called Falling Water. You can see more about the project here.


My selected Hero shot:


My selected Detail shot:


And a few words to introduce both images:


Many Hero shots of FLW’s Falling Water capture it from the river below with the massively cantilevered balconies reaching out over the rapids. I’ve chosen this one because while it reflects the majority of the Hero shots it surprises because it’s taken in the middle of winter when the river is frozen over. The movement of the river has been halted, which makes me think that the Architecture might have been considered as a series of moving projections but has also been halted. The detail shows the rock that the family used to visit, and fell in love with, before they commissioned Wright to build their house there. It both metaphorically and literally anchors the house to the landscape and contrasts the geometric elements that dominate the design. The raging fire also contrasts the frozen river in the previous, Hero, shot. Together they make you think about things that can only be inferred at a distance in images … temperature … warmth inside vs bitter cold outside. Together they say that architecture is an embodied experience.

My second image is from Spanish architects Ensamble Studio, it is called the Hemeroscopium House. You can see more about the project here

My selected Hero shot:


My selected Detail shot:


A few words to introduce both images:

This house presents as a combination of over-sized parts that seem to depend on each other to maintain balance. It is almost toy like and its assembly a kind of game. This is perhaps most clear in this video. The detail shot shows the rough block that acts like a keystone in a traditional vaulted structure, locking all the other parts together.

My third choice is a fire station by Zaha Hadid. You can read a little about it and see her beautiful drawings here.

My selected Hero shot:


My selected Detail shot:


A few words to introduce both images:

The Vitra fire station is one of the most famous contemporary buildings in the world. This Hero shot is perhaps the most famous of its images. The soaring cantilever of its entry porch demonstrated the dynamics Hadid had first introduced with the Hong Kong Peak project. Many conservative architects derided her for her vision with the Peak project, casually dismissing her as lacking the understanding that concrete isn't weightless. She proved them wrong 20 years later, with this fire station. The Detail shot shows the forest of columns that I believe was inspired by Alvar Aalto's Villa Mairea; you can see them here.   

My fourth project is the Highline in NYC by Diller, Scofidio and Renfro. See more info here.

My selected Hero shot:


My selected Detail shot:


A few words to introduce both images:

The Highline is a re-purposed elevated train line that ran through an almost forgotten part of Manhattan. By transforming it into a park it has brought activity, pleasure and revitalized this area of the city. You can see in the Hero shot the existing older buildings are being joined by contemporary designs that seek to capitalize on their location near a new and much loved urban park. The detail shot shows some the the old railway lines that are allowed to penetrate the new walking surface; establishing a dialogue between their materials.

My final project is  the Sydney Opera House by Jorn Utzon. See here for some great images of the building under construction.

My selected Hero shot:


My selected Detail shot:


A few words to introduce both images:

The opera house is perhaps the most heroic of all of my selected projects ... its concept, of sails floating over a rocky podium, is clearly expressed in almost every shot one sees online. In some ways though, these Hero shots obscure many interesting aspects of the architecture. The metal work in the building doesn't demand so much attention, but it should. My selected detail shows how the metal fins of the facades shape and filter space at the same time.

I hope these and the ones selected by your tutors inspire you to create your own Hero and Detail shots of your completed architecture. I encourage you to follow the links above and your tutors links to learn more about the projects they select; remember the old saying "you are what you eat", your tutors are preparing a feast of architectural goodness, so bring your appetite! 

Regards

Russell 

Thursday, March 14, 2019

Finding the Lumion install files on the Built Environment Computer System

Hi All,

To get to the ARCH1101 courses folder on the computers in the Built Environment computer labs you'll need to log on and open File Explorer ... unfortunately this isn't as obvious as it should be in Windows 10.

To open File Explorer hit the Windows key and the "E" key at the same time. There are other ways you can see here.


Once you've done that File Explorer will open and along with the local hard drives you'll see a network drive called courses ... navigate here: S:\Courses\ARCH1101-ArchDes1\Resources to see the Lumion Folder. Remember to download its entire contents.

Regards

Russell


Wednesday, March 13, 2019

Lumion on a Mac

Hi All,

I was surprised today to see so many Mac's in the studio ... we usually have around 15% Mac's and the rest PC's; today it looked more like 30-40% Mac's.

Unfortunately Lumion only runs on PC's.

See this page describing what you need to do to get it running on your Mac.

Another option is to use UNSW myAccess | AAA ... you can find info about that here. I'm told that is painfully slow though ... 

The final option is to use the Built Environment computer labs which all have Lumion installed. Aside from the inconvenience of having to go to the labs this isn't a bad option ... the desktop computers there are probably much faster than your laptop or desktop at home.

Actually, the final final option is to purchase a new PC. Getting one that is "VR Ready" will most probably last you for 3-4 years and make life in the PC dominated world of Architecture much easier.

Regards

Russell


Tuesday, March 12, 2019

Film, Animation, Machinima

Hi All,

Below are a few videos to inspire your animated sections this week:

1. This clip shows you some of the editing techniques used in feature films. Kill Bill was directed by Quentin Tarantino who worked for a long time in a video rental store (which became DVD rental stores and now Netflix) and developed an encyclopedic knowledge of popular films. This might explain why he uses so many editing techniques, and consequently why his scenes are useful to film students for demonstrating how each technique might be used.  It's wise to consider the point of view shown in your animated sections because, as you can see below, point of view can radically transform our appreciation of the space.


2. The making of the animated film The Third and The Seventh. This clip shows the different layers that go into creating a photo-realistic digitally created scene. The take away point here is that you should think about post processing your still images and even videos captured from Sketchup to give them more richness in terms of materials and atmosphere.


3. The game Red Faction Guerrilla is famous for its in game destruction. It's still a classic today. In this clip you'll hear one of the developers talking about the levels of material/structural realism and making the observation that their level designers are becoming "less and less a 3d structure artist and more and more an Architect". This says two things ... visual realism is increasingly supported by physical realism in virtual environments ... and, you might think about a career in designing Architecture in a virtual world.


4. Extending the notion of real time physics interactions, see the clip below by Nvidia. It shows their FleX system and asks you to imagine how you might use it in the future. The air flow around the sports car makes us think about air flows around and through buildings; a key ingredient for comfortable and sustainable Architecture. Obviously the applications for real time design in Civil Engineering are also very exciting.

Wednesday, February 27, 2019

Assessment weighting and criteria

Hi All,

In the spirit of absolute transparency I would like to remind you of the weighting of each component of the first assessment and also share with you the feedback you'll get relative to certain marks ... we hope this will help you focus your efforts.

The brief says your conceptual model needs to be distinctive and significant.

Distinctiveness is weighted 70% while significance is weighted 30%. This means you should concentrate more on distinctiveness than significance.

So, in this context, what does it mean to be distinctive or significant?

Distinctiveness means what you've designed stands out, is imaginative, exciting, unusual, surprising or novel.

Significance means that what you've designed is meaningful, could change the way other designers think about a stair, could be influential, and is generally more pragmatic.

Distinctiveness and Significance can be demonstrated through several aspects of your design: its form, space, materiality, structure, light, shadow, etc.

Now, with those terms defined, what feedback will you get for each grade band:

Distinctiveness (70%)

Fail (0-45): The stairs do not demonstrate a distinctive approach to bringing the clients completed work into the showroom.

Pass (50 - 60): One aspect of the stairs demonstrates a distinctive approach to bringing the clients completed work into the showroom.

Credit (65 - 70): Several aspects of the stairs demonstrate a distinctive approach to bringing the clients completed work into the showroom.

Distinction (75 - 80): Several aspects of the stairs and the way they work together demonstrate a distinctive approach to bringing the clients completed work into the showroom.

High Distinction (85 - 100): Several aspects of the stairs the way they work together and the way the stair engages with the floor above and below demonstrate a distinctive approach to bringing the clients completed work into the showroom.

Significance (30%)

Fail (0-45): The stairs do not demonstrate a significant approach to bringing the clients completed work into the showroom.

Pass (50 - 60): One aspect of the stairs demonstrates a significant approach to bringing the clients completed work into the showroom.

Credit (65 - 70): Several aspects of the stairs demonstrate a significant approach to bringing the clients completed work into the showroom.

Distinction (75 - 80): Several aspects and the way they work together demonstrate a significant approach to bringing the clients completed work into the showroom.

High Distinction (85 - 100): Several components and the way they work together and the way the stair engages with the floor above and below demonstrate a significant approach to bringing the clients completed work into the showroom.

Regards, and best of luck for Sundays submission!

Russell


Tuesday, February 26, 2019

Task for this weeks studio

Hi All,

You'll find the task for this week is live on the course website ... see the links at the bottom of the page here.

There is also a PDF that includes many examples of stairs that you can be inspired by ... great viewing on the bus or train ... enjoy!

Captured from Instagram, A stair in a contemporary art space in Shangahai by Archi-Union.


See you Thursday in studio at 2pm.

Regards,

Russell

Monday, February 25, 2019

SketchUp Make download

Hi All,

Because Trimble, the owners of SketchUp, are pushing the browser based version of SketchUp there aren't supporting SketchUp Make any more.

However, the latest version SketchUp Make 2017 is still available for download here.


The key advantage it has over the free online version is that you can create custom materials, which we use in the course.

Another option is to purchase SketchUp Pro for educational use from the local Australian re-seller. It's only $71.50 which is pretty good value, and worth it for the solid modeling tools alone in my opinion. You can get that here.

Hope your sections are turning into great little buildings!

See you in studio on Thursday.

Regards

Russell


Wednesday, February 20, 2019

First Lecture and Past Student Work

Hi All,

You can now download the first lecture from the EXP1 brief page here: scroll down to the bottom.

There is also another link to a PDF of previous student work from EXP1 next to the link above.

Here are two examples from the student work PDF:

1. Remmy Dunn's Sketch Section


2. Remmy Dunn's completed project


3. Sen Yan's Sketch


4. Sen Yan's completed project


There are many more inspirational examples in the PDF mentioned above, definitely worth a look; and remember, they all started off where you are now!

Kind regards

Russell